FRIENDS & CORNBREAD.
Slowly but surely, we are starting to make friends! Going to the farmer’s market and visiting some local-food-type places around town has helped us to meet like-minded folks around Danville…even some young farmers! We were invited by these new friends to an AG LEGACY pot luck tomorrow….meeting with other farmers, young and old, to talk about what we do, sharing ideas and information, and connecting. Exciting! We are taking a bottle of Jesse’s wine and some cornbread muffins that I am currently baking. They are smelling prettydelicious, and so I thought I’d share the recipe. I know it is quick and easy to buy that Jiffy cornbread box, but it is truly SO simple to make it yourself….and way better for you. Promise.And as a BONUS, last year at Bugtussle, Jesse fermented garlic scapes and some habeneros early in the season. The result was a sort of spicy, garlicy, hot sauce wine that we have been using to flavor our food. I mixed some of that in with the cornbread and it is DELICIOUS – a very slight kick. Obviously, if you want to make some of the garlic scape stuff, it is going to take a couple weeks or so for it to get really good and fermented. But adding spice to cornbread is always a good idea in my book..
HANNAH’S SPICY CORNBREAD(makes about 25 corn muffins, or 2 pans of cornbread)ingredients:
- 2 ¼ cups corn meal
- 2 ¼ cups flour
- 5 tbsp honey (or sugar, if that floats your boat)
- 3 tbsp baking powder
- ¼ tsp salt
- 1 ½ cups sour milk or yogurt (SOUR MILK MAKES AWESOME BAKED GOODS)
- 10 oz butter or lard (I used half butter and half lard), melted
- 2 eggs, slightly beaten
- 1 cup garlic scape hot stuff (optional, just add another cup of milk if you don’t want to use hot sauce)
Mix all your dry ingredients in a large bowl. Add the butter, eggs and milk as you stir. Bake for 20-25 minutes at 400 degrees.
JESSE’S FERMENTED GARLIC SCAPE SALSA(makes half a gallon)ingredients:
- 1 lb garlic scapes, chopped
- ½ cup salt
- ½ gallon water (or enough to cover the scapes)
Stir the salt into the water. Put the scapes in a glass jar. Pour the water into the jar until they are completely covered, leaving a few inches of space between top of the jar.Let sit for three days in a cool, dark space, making sure the scapes stay submerged. Bubbling and ocassional foam is a GOOD thing! Put lid on jar losely and over the next few days, make sure and unscrew lid enough to relieve pressure in jar. Let sit for a couple weeks in fridge or cellar, until fresh hot peppers are available. Add several hot peppers—at least 5, but as many as you want––and let sit for additional week. Blend together and put in clean jar, still making sure solids are submerged. Serve and ENJOY!
EASTER, NATURALLY.
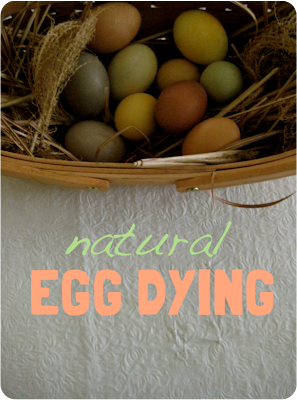
As seen in the previous post, Jesse and I are taking today off. So, we decided to dye some Easter eggs! We wanted to try a more natural approach, as we are a very Anti-Food Coloring (it is gross...plus I am allergic, so we are enemies). For the how-to, you can find endless resources online (especially Pinterest these days), but I used instructions from the first issue of taproot magazine. It is the most lovely and wonderful of all magazines, full of inspiration for homesteaders, homemakers, homeschoolers, and the like. Amanda Soule of SouleMama is the editor, and I have a major lady crush on her. Anyway, the magazine suggests many different ideas for dyes: beets, tumeric, onion skins, blueberries, cranberries, coffee grinds, etc. I used curry and paprika as well. For each color, use one quart of cold water, two tablespoons of white vinegar, and a small amount of whatever you want to use for color.
Bring the mixture to a boil and let it simmer for twenty minutes. Add the eggs and let simmer for another half an hour. Remove the eggs with a slotted spoon to let them dry on a paper towel.
I personally love the way the eggs look, very soft and earthy. But if you wanted to achieve a bright color, I would suggest making a heavily concentrated mixture. Blueberries and curry worked great, coffee was alright, the paprika was bleh. It was fun experimenting, though...switching the eggs from one bath to another while they cooked to try to create new colors.
Do you have any tips for dying eggs? What spices or foods do you use for color? I am eager to keep trying, playing with different ingredients...but I'm not sure how many hard boiled eggs we are prepared to eat this week!
- Hannah.
MAKE YOUR OWN OREOS.
A favorite writer of ours, Michael Pollan, gives this food rule: "Eat all the junk food you want, as long as you cook it yourself." While this may be a TAD extreme - homemade french fries every day might not be a good idea - I am a firm believer in this basic idea. I have a sweet tooth that can be a bit terrifying at times (see numerous previous posts mentioning donuts). In moments when I find myself in the panic of a craving, it helps to slow down and take the time to bake something instead of rushing to the store. So recently, I decided to make my own Oreos. I found the recipe here, and of course I only vaguely followed it, but BY GOLLY it worked! I’m serious, ya’ll. These taste just like Oreos! They are by no means healthy, but they are definitely healthier than supporting Nabisco, and I used lots of raw honey and butter instead of sugar and shortening. Hooray for homemade junk food!Making these cookies was incredibly easy. You could use cookie cutters and make these look a little bit more like the Real Thing if you want, but it seemed like a shame to waste any bit of cookie to me!
- 1 1/4 cup all-purpose flour
- 1/2 cup unsweetened cocoa powder
- 1 tsp. baking soda
- 1/4 tsp. baking powder
- 1/4 tsp. salt
- 3/4 cup honey
- 1/2 cup of room temperature butter
- 1 large egg
Mix all your dry ingredients together in a medium-sized bowl (flour, baking soda, baking powder, cocoa, and salt)
Beat in the egg, butter, and honey until the whole mixture turns into a sticky dough.
Use heaping teaspoons full of batter, placing them on baking sheet (greased or parchment paper) about 2 inches a part. It seems like not a lot of dough, but it really works well. Wet your palm and press the balls of dough to flatten them.
The original recipe recommends to bake for 9 minutes at 375 F. I did more like 5-6 minutes, but I really like chewy cookies.
- 1/2 cup room temperature butter
- 1 1/2 cups powdered sugar
- 2 tsp vanilla extract
- 1 tsp milk
I simply whisked everything together in a deep-set bowl, but if you have a mixer I suppose that is the proper way.
Place the icing in the fridge for a while to let it thicken a bit, then place a dollop in between two cookies (once they have cooled) and smush them together until the icing spreads to the edges. See, easy!
SUPER SNACKS.
Last night, most of us took part in an American tradition composed mostly of television and food (sounds about right). Seriously though, did you know that nearly ONE BILLION chicken wings were consumed yesterday? That is sort of remarkable. And horrifying. But snacking during the Super Bowl is tradition...and not to be left out, my family also made some game-watching foods for the big game.
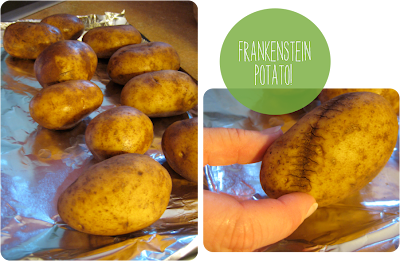
We didn't, however, have wings. No thanks. But we did have some really tasty takes on traditional snack foods that were light and refreshing and didn't leave us feeling gross, heavy, and full. Mom found a recipe for potato skins on her new favorite website Poor Girl Eats Well. These were truly SO delicious! I'm not talking about those greasy, bacon and cheese slathered skins. Mom's potato skins were so fresh and light...full of good veggies and flavors: black beans, salsa, cilantro, corn, cumin, onions. And not to be without some sweets, I made some chocolate cupcakes. Instead of piling them full of sugar, I used honey and maple syrup! This kept them tasting sweet and made them super moist. I also hid some chia and flax seeds in there! All in all, we ate really well, and we didn't wake up this morning feeling bloated and disgusting. Plus, we are currently eating an amazing breakfast out of the leftovers!
- Hannah.


